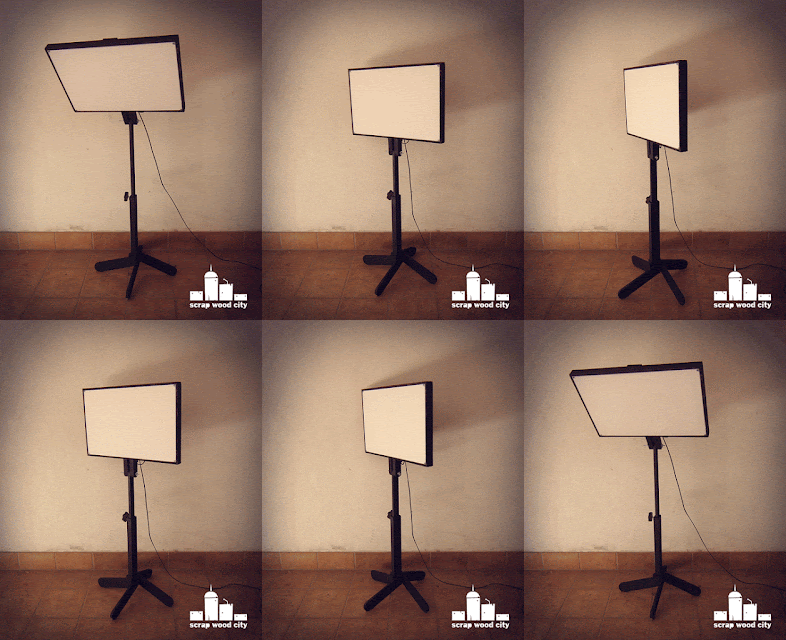
I made this floor standing light using mostly MDF, pallet wood and led strips. It's light is kind of neutral cold. You can choose the LEDs you want in order for the light to have the color that suits your needs. It is also dimmable, which means you can adjust the brightness of the light.
I begun by cutting a few pieces of 10mm MDF to size on my table saw. For the cross cuts, I used my cross cut sled.
I then glued the sides of my frame using wood glue. I used corner clamps to keep things in place, predrilled holes and added two screws in every corner of the frame.
I used the bandsaw to cut four wood pieces which I glued in the corners of my frame.
I then cut the backside of my light to size on the table saw. Because the acrylic front was more sensitive I cut it on my bandsaw. My bandsaw has a finer tooth blade and cut the milky acrylic pretty nicely.
The acrylic front and the MDF back are screwed in place. The screws go into these small wood corners blocks I cut earlier. Ofcourse I predrilled before adding the screws to avoid wood splitting.
The acrylic sheet in the front helps diffuse the light creating better outcome in the image of the video.
I then used the thickest plywood I had to create two pieces that would be screwed on the frame. I taped them together, sanded them flush on the disc sander and drilled a hole through them in the drill press. I then glued and screwed them in place. To keep them aligned I passed through both of them a metal screw.
I then added a cleat on the back of my frame. This acts as a reinforcement to the structure but it also provides a place for to mount the electric parts of the light.
I then made the post of the light. I shaped it on the disc sander.
The post slides in a pocket which I made out of 12mm plywood. I glued and nailed it together.
I then made four identical legs out of scrap pallet wood. I Cut them on the bandsaw and shaped them on the disc sander. I then predrilled and screwed them in place.
I cut a small metal piece to size, using my angle grinder. I drilled a few holes on the drill press. I used a tap to create threads in the middle hole. This way 6mm threaded rod can tight the post of the light in place.
I then designed a knob on a scrap plywood piece and cut it out on the bandsaw. I used my rotary tool to sand it’s curves.
I then flattened one edge of 6mm threaded rod with my angle grinder. I drilled a hole on the knob. I mixed some two part 5 minute epoxy glue and hammered and glued the rod inside the knob.
Video and photography gear is usually black because you don’t want it’s reflections in your video shots. So I painted all the parts of my light with black matte spray paint.
Now it was time to connect the electrics. I layed out the LED strips on my panel. You must cut them in the places where there is a scissors symbol. I then soldered the positive poles with each other and then the negatives with each other. I then connected the power source to the dimmer and then the dimmer to the LEDS. I made a test and everything worked out OK.
I then added some hot glue to secure the strips better in place. Their adhesive does not always hold well.
I mounted the power source and the dimmer on the back of my light. At this point I had to disconnect the LEDs. So I passed the cable inside the light through a hole and reconnected everything. I used electrical tape to make sure the soldered parts don’t touch and I also added some hot glue to make sure the cables were nice and secure.
My video light was now ready and it works really well. Perhaps in future I will add more LEDS to make it brighter. I can also make a couple of other panels with different colors on the lights in order to achieve different color balances in my videos!


No comments:
Post a Comment